One of my favorite holiday activities is checking out the 12 Tags of Christmas with a Feminine Twist 2012 on the Ellen Hutson blog. This year, I have been inspired by this tag done by Paula Cheney done on Dec 9 and shown below mine. She has great instructions that I most followed - with just a few substitutions here and there.
I love Paula's use of Tim Holtz products; with lovely, soft colors - and a bit of sparkle. I don't have the wreath die (aren't you surprised), but substituted his snowman - one of my favorite holiday images. I also used the bird and holly mover and shaper dies and a circle die and substitued the snow embossing folder for the poinsettia.
I really like Paula's use of Spun Sugar, but thought that broken china was a better choice for snow. The bird was colored in Victorian Velvet stain. I picked up the die cut for the JOY when I was in St Pete for a class at Whim So Doodle last weekend. I am still waiting for my order of the platinum glitter so I used another gold glitter in it's place; it came out great. I love her directions for using the powder glue - I had it in my stash, but this was the first time I have liked the results. It is still not as permanent as I would like for glitter, but forthis tag it worked great on these small pieces of greenery. I also like the way she used rolled glue dots to attach the narrow letters. I added a layer of Antique Linen Distress Stickles to the bird and the JOY. All pieces were distressed with Vintage Photo.
Showing posts with label christmas. Show all posts
Saturday, December 15, 2012
Thursday, August 2, 2012
MFTWSC#82
Spent the morning running errands and stopping by school to pick up my new rosters and then I headed home to play with the new sketch. I really like this one and have several ideas that I want to try. For this one, the background is SU Midnight Muse dry embossed with the Holtz snowflake folder and layered on white and then onto a Wisteria card base. I created some pretty paper by putting Distress stains(broken china and concord) and Perfect Pearl Mist on a craft sheet and the pulling white cs through the inks until it was covered. After drying it, I die cut the paper with MFT Fishtail Flags. I wish the wonderful shine showed more in the photos. The "Joy and Love" sentiment is an oldie from Great Impressions (C-32) that I stamped on one of the flags using black archival ink.
After stamping MFT's Heart Stripes on neenah with Memento black ink, I colored her with copics, and layered her using nestability dies and SU paper: Wisteria and Midnight Muse. This is then raised onto a large diecut snowflake (for SU bySizzix) that is cut from SU's glitter paper (my very favorite glitter paper - and the new Champagne color is totally awesome!). A MFT snowflake die cut from SU glitter paper and decorated with bling (colored with copics: V04 and BG45) finishes the front.
Her face is colored with E000, E00, E01, R20, R00 and BV00. Her hair is Y21, E15, and E39. Her hair clip is colored with Spica glitter pen in lavender. Her jumper is B32, BG45 and B34. Her striped shirt is BV02, B04 and V04.
Inside is another glitter snowflake from the MFT die layered on a small scallop punch (new one from SU) of midnight muse and then added to another fishtail flag. The inside verse is another oldie, this one is from Embossing Arts (560-J).
After stamping MFT's Heart Stripes on neenah with Memento black ink, I colored her with copics, and layered her using nestability dies and SU paper: Wisteria and Midnight Muse. This is then raised onto a large diecut snowflake (for SU bySizzix) that is cut from SU's glitter paper (my very favorite glitter paper - and the new Champagne color is totally awesome!). A MFT snowflake die cut from SU glitter paper and decorated with bling (colored with copics: V04 and BG45) finishes the front.
Her face is colored with E000, E00, E01, R20, R00 and BV00. Her hair is Y21, E15, and E39. Her hair clip is colored with Spica glitter pen in lavender. Her jumper is B32, BG45 and B34. Her striped shirt is BV02, B04 and V04.
Wednesday, July 18, 2012
CAS Christmas
Completed my next set of Christmas cards and met the Stamp Club challenge with this card:
The cardstock is from Marco's Paper - a cream shimmer - that I bought on sale at Stamp Fest in February
The "joy" is cut using MFT lowercase alphabet dies. I measured and then taped the back of the dies to a piece of acetate so that they would be even when cutting. All I had to do was line up the side and bottom of the acetate with the edge of the card, placing the cutting side down, to get straight cuts each time. I would suggest making the piece of acetate the size of the card front (there is a slight impression at the edge of the piece).
The holly is SU old olive cs that was cut with a McGill punch. The holly punch out was colored with distress stain, then covered with glossy accents and glitter to create an epoxy-look sticker. The bling was from Michaels.
The cardstock is from Marco's Paper - a cream shimmer - that I bought on sale at Stamp Fest in February
The "joy" is cut using MFT lowercase alphabet dies. I measured and then taped the back of the dies to a piece of acetate so that they would be even when cutting. All I had to do was line up the side and bottom of the acetate with the edge of the card, placing the cutting side down, to get straight cuts each time. I would suggest making the piece of acetate the size of the card front (there is a slight impression at the edge of the piece).
The holly is SU old olive cs that was cut with a McGill punch. The holly punch out was colored with distress stain, then covered with glossy accents and glitter to create an epoxy-look sticker. The bling was from Michaels.
Inside, I used MFT fish tail flags to cut dp from Authentique "Festive". The sentiment is from Penny Black called "Joy - Hope" and is stamped in SU ink: old olive.
Friday, June 15, 2012
Day 3 of Summer: organizing and round two of Christmas
It's been a productive day, I spent the morning at the farmers market and the afternoon in my craft room after a lunch break by the pool with my latest book-it's been an overcast day and pleasantly breezy.
First for organization: I have been working on reorganzing my copics and other pens. I found another old sizzix die storage unit and shifted my workspace around to fit it in.
I also created another set of Christmas cards (I will have them done early! I will have them done early!) I popped up the Memory Box window die on SU paper (whisper white and midnight muse), seam binding and ribbon (cherry cobbler). The tapestry embossing folder has been around for awhile. I thank Jan for the Martha fern punch - I had looked for it forever. The stamped scene is a retired SU image stamped in Midnight Muse ink from SU. The sky is done by blending distress inks (stormy and china) over a masked moon. Perfect Pearls is spritzd over the image. The tiny "JOY" tag is an older stamp (stamped in cherry cobbler ink) used with a SU punch.
I have updated the "Charm" page with ourAlice in Wonderland swaps. Be sure to scroll down to check these beauties out; they are totally awesome!
First for organization: I have been working on reorganzing my copics and other pens. I found another old sizzix die storage unit and shifted my workspace around to fit it in.
I also created another set of Christmas cards (I will have them done early! I will have them done early!) I popped up the Memory Box window die on SU paper (whisper white and midnight muse), seam binding and ribbon (cherry cobbler). The tapestry embossing folder has been around for awhile. I thank Jan for the Martha fern punch - I had looked for it forever. The stamped scene is a retired SU image stamped in Midnight Muse ink from SU. The sky is done by blending distress inks (stormy and china) over a masked moon. Perfect Pearls is spritzd over the image. The tiny "JOY" tag is an older stamp (stamped in cherry cobbler ink) used with a SU punch.
Wednesday, May 30, 2012
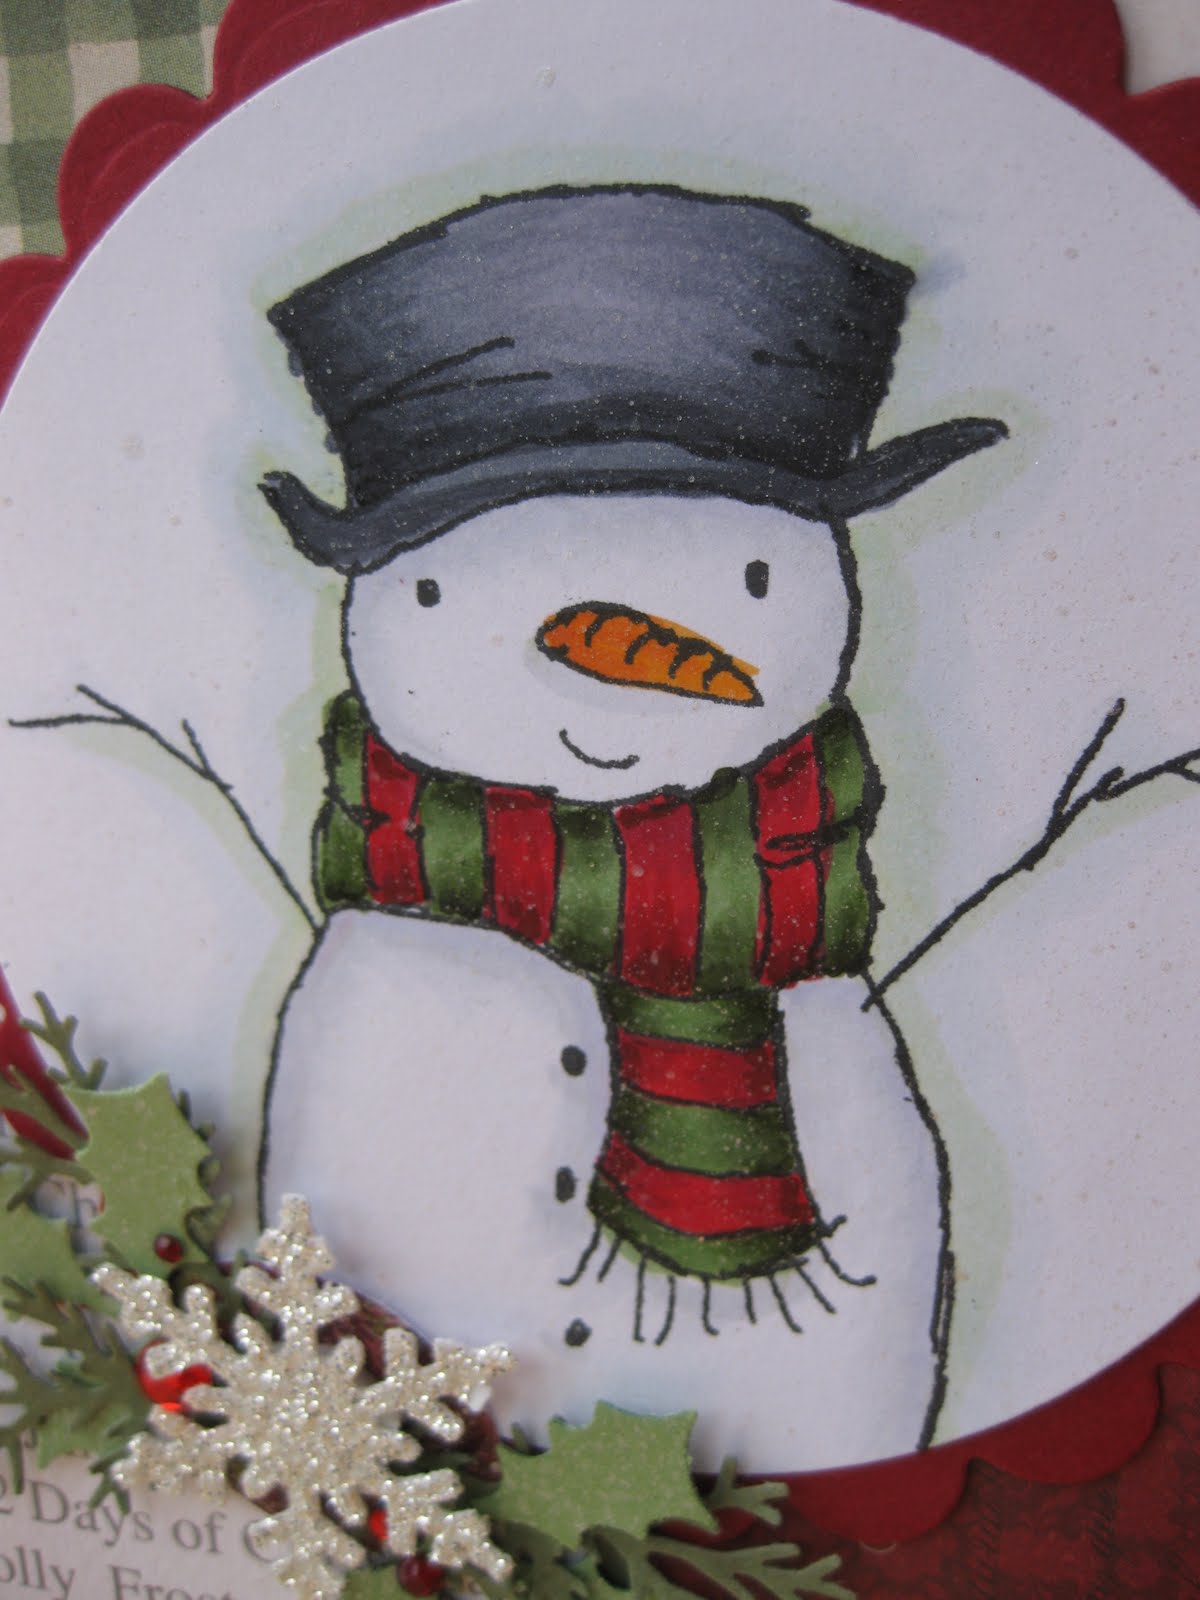
The Christmas Sprirt
Copic colors used:
Hat: BV23, C5, C7, C9
Snowman: C1. B60, and 0
Nose: YR15, YR18
Scarf: Red: R29, R39, R59
Green: G24, G94, G99
Shadow: G40, BG70, 0
Labels:
christmas,
copics,
holiday hugs,
MFT,
PI,
pure innocence
Wednesday, November 23, 2011
Giving Thanks
Kitty shared her pattern for making a very elegant "Tree" box. I will post a picture as soon as I finish. I can't believe that she cut out everything for us. Elaine also showed us her new "smash" book and it inspired me to challenge our group to make one only using supplies that we already have. We can't buy anything, but we can shop in a friend's stash. (Stop whining; I know it's time to get ready for the holidays, but it's my role to lead you on new adventures!)
Be sure to check out the Charms page; our November "Bird" swap finally came in and are so pretty. I love seeing the variety of materials that everyone uses to interpret the theme.
Tuesday, November 15, 2011
I had such a nice time sharing my excitement for using Distress Stains last night at stamp club and really enjoyed seeing all the groups' wonderful Christmas tags.
Recently, I picked up a new Hero Arts Christmas stamp set; I just couldn't resist (remember this blog is about my obsessions). I love the crisp, clean look of this set: Merriest Christmas Wishes and it has a nice collection of verse. I stamped the image in Distress Stormy Sky on white. I looked nice, clean and crisp, but.... I had an idea. Many of my recent projects get thrown into the "box" to get spritzed and glitzed so... First, I inked the image with Stormy Sky,
then I spritzed (twice) a flourish background stamp with "pearl" Perfect Pearls Mist. Remember to shake until all the color is suspended before spraying so the nozzle won't clog.
I really love the "stormy" look that resulted. A bit of red marker and a coating of glossy accents for the bird, plus a few more finishing touches and another set of Christmas cards are ready to share with friends. I find that my attention span for making a stack of cards is limited to about 20 cards. My goal was to have three sets done by Thanksgiving. Yes, I know it's next week-this makes two sets done.
Next, I "kissed" the inked image to the spritzed background stamp and then stamped the image on white cardstock.
Subscribe to:
Posts (Atom)